NestJS Simple Chat 新建工程
更新日期 2022-5-9
- 2022-5-9 创建文档
开发环境
- macOS 12.3.1
- nest 8.1.5
- postman 9.17.1
本文目标
- 创建一个新的nestjs工程
- 建立websocket服务端
- 掌握postman测试websocket的方法
创建工程
首先新建一个nest工程simple-chat,选择使用npm来管理
工程默认监听3000端口,暂时不去修改配置和代码
进入simple-chat目录,执行启动命令
服务运行起来了
> simple-chat@0.0.1 start /Users/rustfisher/Desktop/ws/nest-sample/simple-chat
> nest start

LOG [NestFactory] Starting Nest application...
LOG [InstanceLoader] AppModule dependencies initialized +14ms
LOG [RoutesResolver] AppController {/}: +29ms
LOG [RouterExplorer] Mapped {/, GET} route +2ms
LOG [NestApplication] Nest application successfully started +2ms
用浏览器访问 http://localhost:3000/ ,可以看到 Hello World!
安装依赖
安装需要的包
安装完毕
建立gateway
输入nest -h查看帮助,找到新建gateway的命令,执行命令新建gateway chat1
$ nest g gateway gateway/chat1
CREATE src/gateway/chat1.gateway.spec.ts (453 bytes)
CREATE src/gateway/chat1.gateway.ts (239 bytes)
UPDATE src/app.module.ts (319 bytes)
执行完毕后,会在src/gateway目录下得到2个新文件
并且会自动在app.module.ts的providers里添加Chat1Gateway
修改Chat1Gateway让它返回一个对象
本地运行
服务运行起来了
[Nest] 3759  LOG [NestFactory] Starting Nest application...
[Nest] 3759  LOG [InstanceLoader] AppModule dependencies initialized +39ms
[Nest] 3759  LOG [WebSocketsController] Chat1Gateway subscribed to the "message" message +94ms
[Nest] 3759  LOG [RoutesResolver] AppController {/}: +1ms
[Nest] 3759  LOG [RouterExplorer] Mapped {/, GET} route +2ms
[Nest] 3759  LOG [NestApplication] Nest application successfully started +1ms
Chat1Gateway注册了"message"消息
测试验证3000端口的websocket
我们用postman进行测试
- File - New - Websocket Request
- 选择Socket.IO
- 输入
localhost:3000,点击connect连接 - postman添加消息监听,监听
message - 编写要发送的信息,点击发送
postman测试连接与传输消息
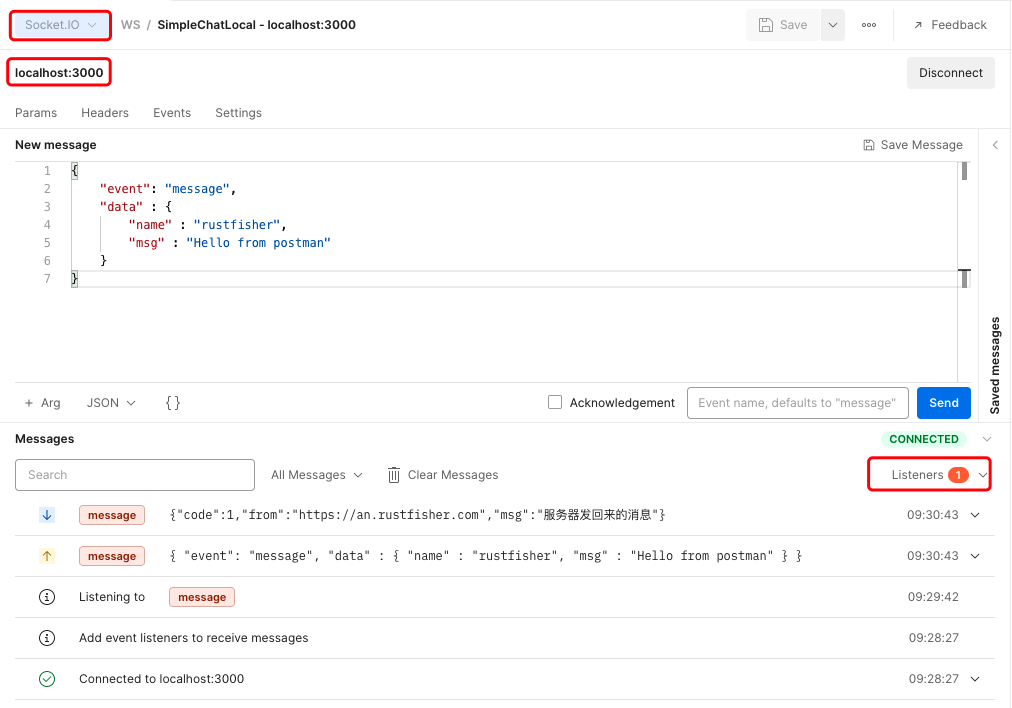
注意:现在这个版本的postman需要手动去注册监听的消息
Postman发送的消息名
现在这个版本的postman需要手动去注册监听的消息
event要手动写到发送按钮「Send」左边的框里,否则默认就是「message」
发送消息给服务,服务也返回了消息。
此时3000端口同时提供了http访问和websocket访问
指定端口websocket
要换一个websocket的端口,可以在@WebSocketGateway中指定
websocket path
前面我们把websocket的端口指定为了3001,现在删掉端口号3001,用默认的。
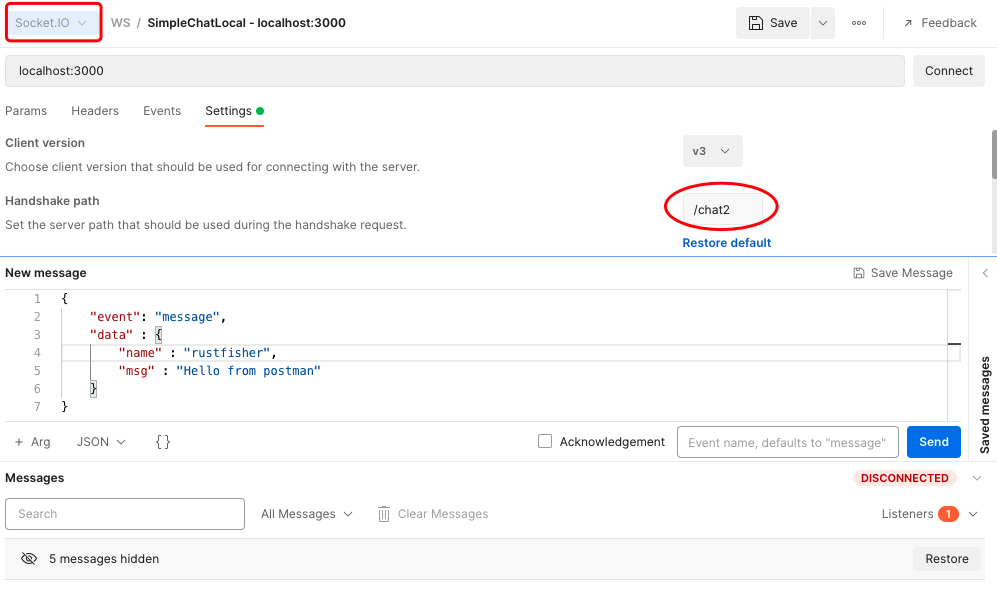
配置path
再建一个gateway
得到chat2.gateway.ts修改一下chat2.gateway.ts
path: "/chat2"
再修改一下chat1.gateway.ts
这2个gateway用同一个端口,但是有不同的path
运行起来
$ npm run start

> simple-chat@0.0.1 start /Users/rustfisher/Desktop/ws/nest-sample/simple-chat
> nest start

[Nest] 6235  LOG [NestFactory] Starting Nest application...
[Nest] 6235  LOG [InstanceLoader] AppModule dependencies initialized +17ms
[Nest] 6235  LOG [WebSocketsController] Chat1Gateway subscribed to the "message" message +45ms
[Nest] 6235  LOG [WebSocketsController] Chat2Gateway subscribed to the "message" message +1ms
[Nest] 6235  LOG [RoutesResolver] AppController {/}: +1ms
[Nest] 6235  LOG [RouterExplorer] Mapped {/, GET} route +2ms
[Nest] 6235  LOG [NestApplication] Nest application successfully started +1ms
Chat1Gateway和Chat2Gateway都注册了消息
测试连接
同样用postman进行测试
postman选用「Socket.IO」,点击「Setting」页,将Handshake path改为/chat2
配置path为/chat2
连接测试
chat2连接测试
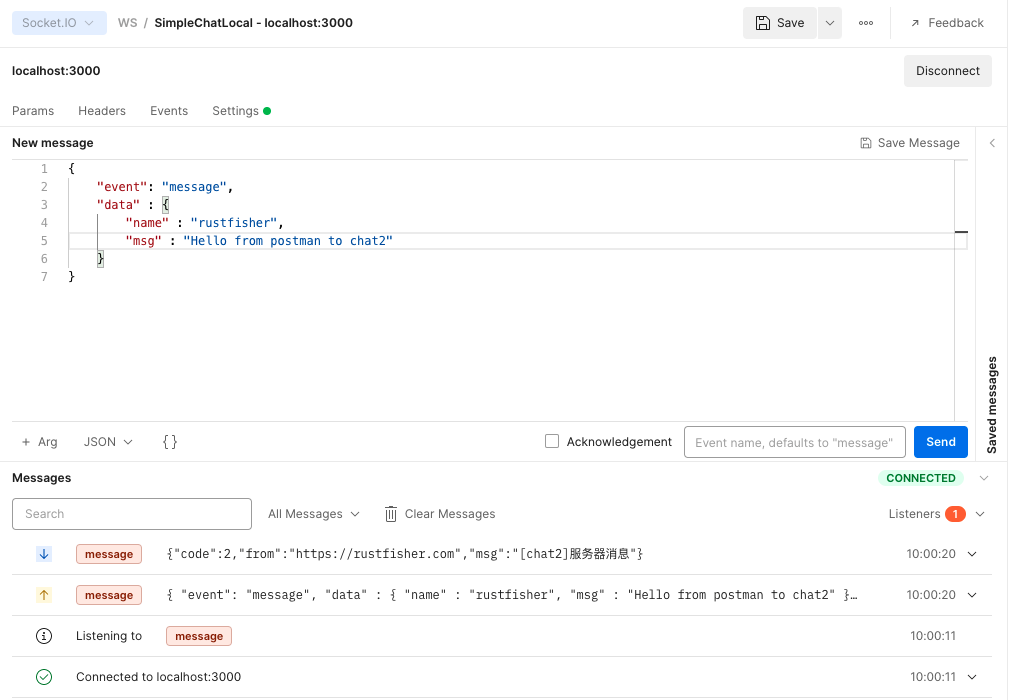
同理,可以去连接测试chat1
这个配置除了path,还有跨域cors等等,后面我们会接触到