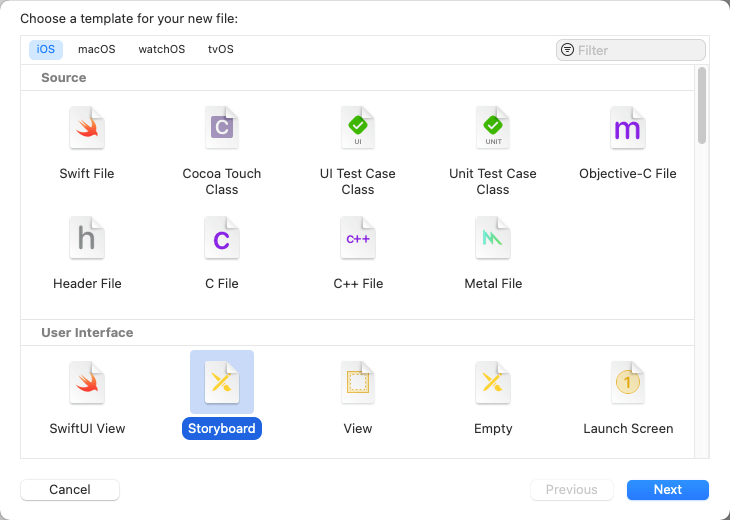
iOS TableView Storyboard示例 显示列表
更新日期 2022-2-17
- 2022-2-17 创建文档
开发环境与工具
- Xcode13
- iOS 14.4
- Swift
简介与目的
列表是一种常见的现实信息和数据的方式。比如通信录,消息,文章目录和简介。同一类(或者多类)信息放在一个列表中。
本文介绍在iOS开发中,在storyboard中使用Table View Controller,实现一个列表。
使用storyboard过程中有大量的鼠标操作。下面是操作和代码。
添加Table View Controller
新建一个storyboard起名叫TableViewSample1.storyboard
删除自动生成的View Controller Scene
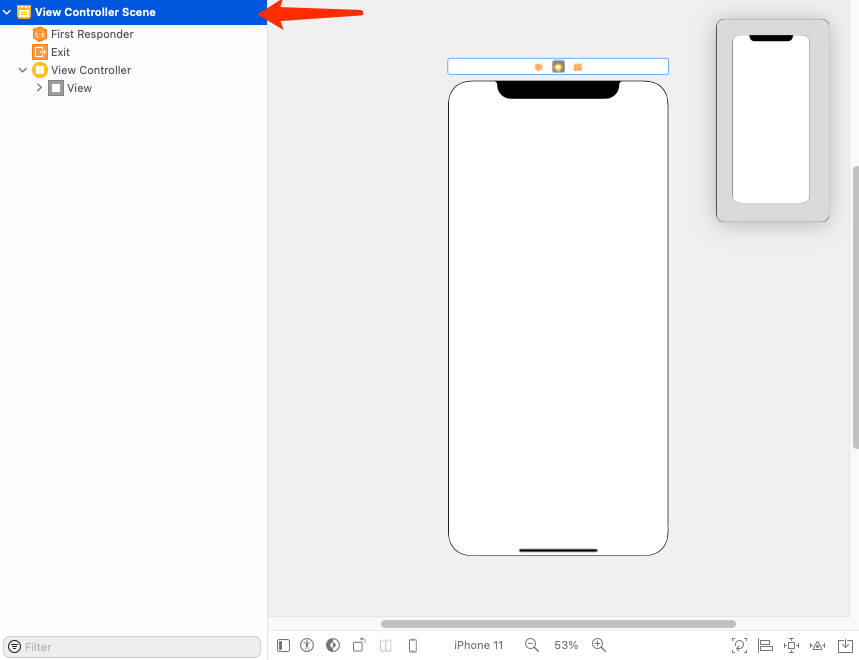
删除后左边栏显示No Scenes
按Library按钮(也就是右上方的+号),输入table找到Table View Controller
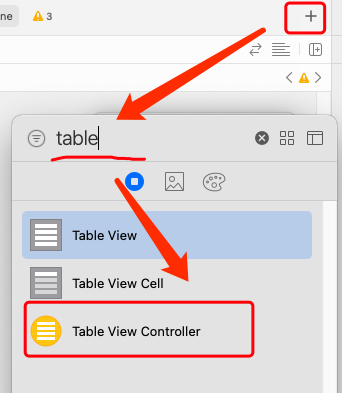
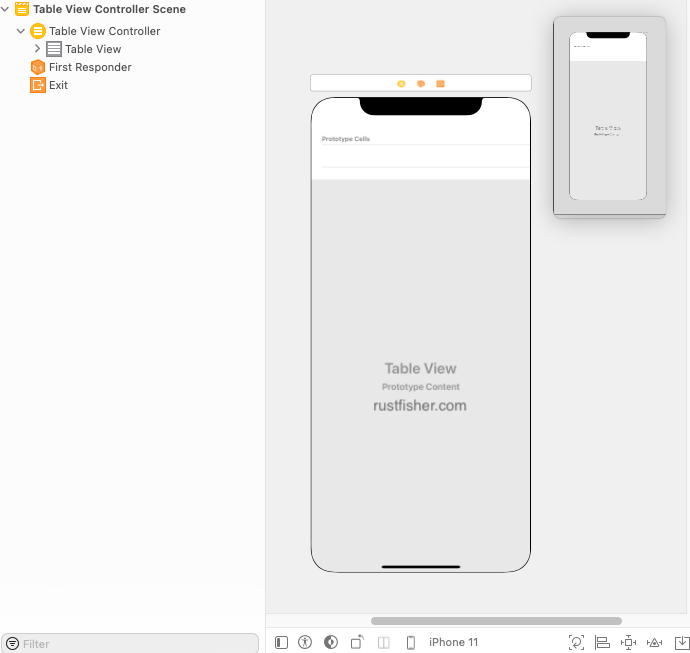
把它拖到界面空白处,添加成功
编辑子项样式
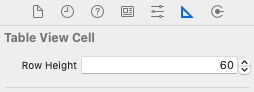
选中Table View Cell,调整子项(cell)的高度,便于后续设计
先添加一个按钮到子项中
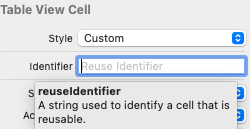
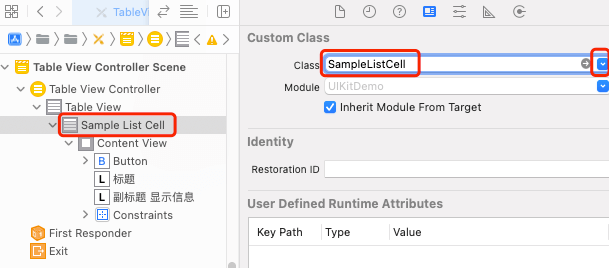
设置cell的id
指定Cell的id,这里填SampleListCell。后面写View Controller的时候会用到这个字符串。app需要根据这个id来找到对应的cell。
如果这里弄错,app运行会报错
Terminating app due to uncaught exception 'NSInternalInconsistencyException',
reason: 'unable to dequeue a cell with identifier sampleDataCell - must register a nib or a class for the identifier or connect a prototype cell in a storyboard'
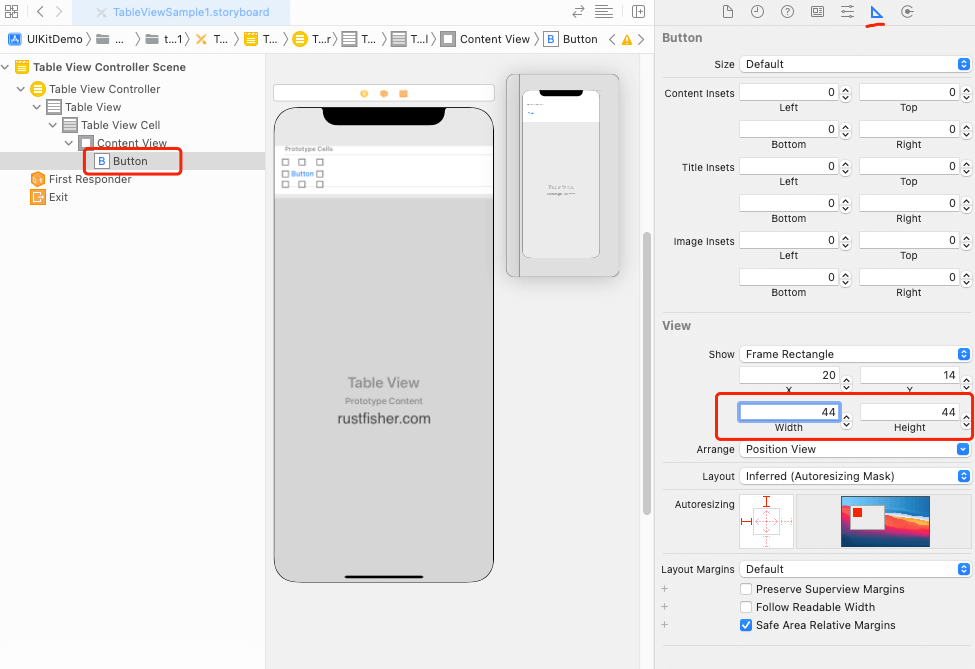
添加按钮
先设置它的大小
把它里面默认的文字删掉。给它设置样式。
- Background设置为Custom
- Corner Radius设为44
- Stroke 选个颜色,这里选的是
AccentColor

现在显示的是一个圆圈。接下来我们设置按钮自身的约束,让它能保持这个样子。
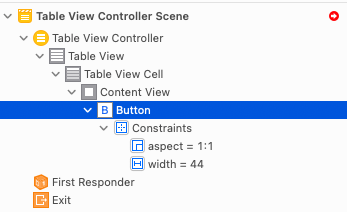
按钮约束
给按钮添加约束
- 取消
Constrain to margins - 勾选
Width,设置为44,即固定宽度 - 勾选
Aspect Ratio
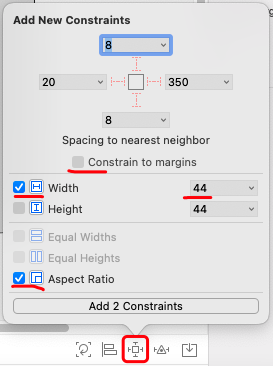
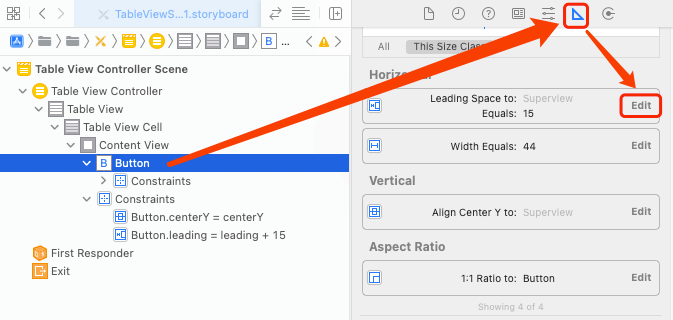
点击添加按钮,观察Button那一栏,可以看到添加的约束条件
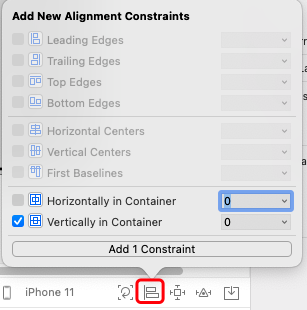
接下来给按钮添加约束,先让它竖直方向居中。
选中这个按钮,然后在下方工具栏找到对齐选项。勾上Vertically in Container,偏移量设置为0。点击Add 1 Constraint按钮添加这个约束
观察侧边栏,可以看到添加上的约束Button.centerY = centerY。
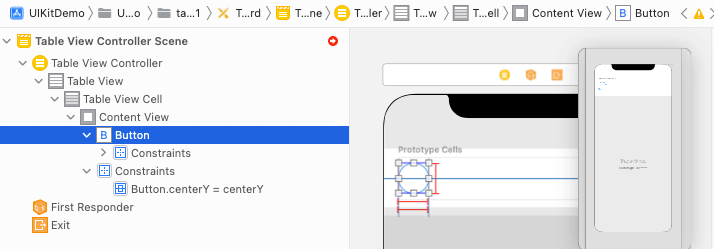
看到上面那个红色小箭头,Xcode提示说还要加一个x方向的约束。
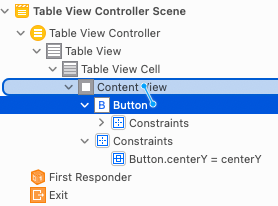
在左边栏鼠标右键按住Button,拖动到Content View上面然后放开,可以看到弹出菜单
在菜单中选择Leading space to Container,生成一个约束。
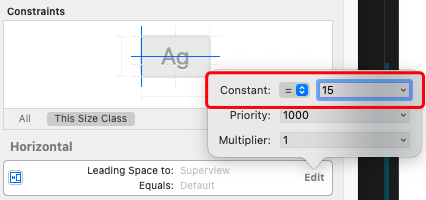
然后可以设置距离参数,先找到设置按钮
在弹出的窗口中,填入数值。这里的是Standard。这里的数值可以调整成你喜欢的。
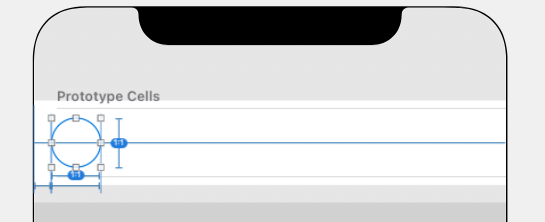
此时的设计预览图如下
添加Label
添加2个Label来显示文字信息
添加一个Label显示标题。按前面的方法拖入一个Label,然后可以在预览图中右键按住Label,拖动到按钮身上。
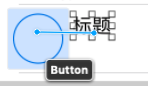
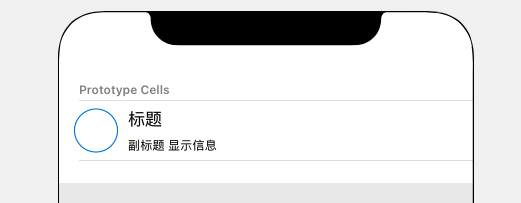
在菜单中选择Horizontal Standard Spacing,确定它到按钮的距离。添加后如下图。
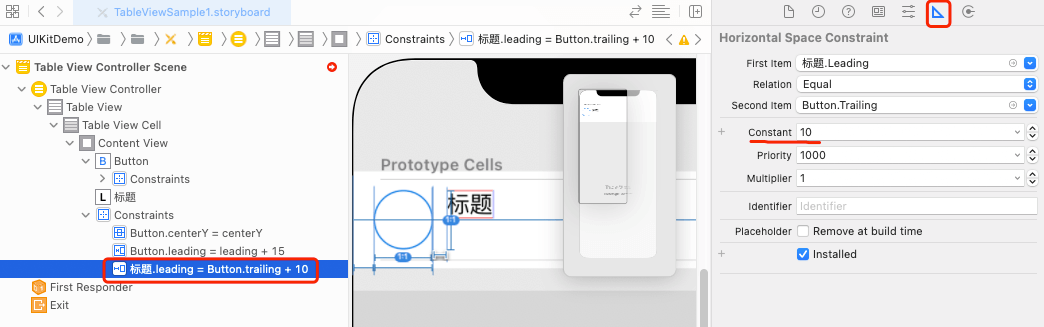
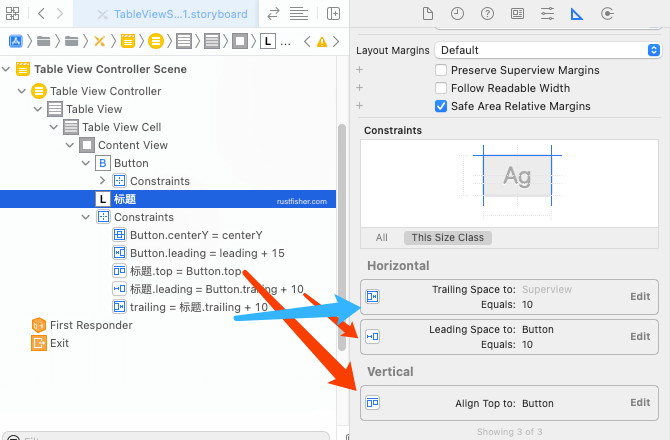
然后添加约束确定标题Label上方(top)与按钮顶部对齐。标题Label右边(trailing)和父view设置距离。
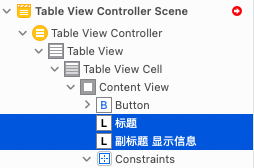
再添加个副标题label。左边栏同时选中这2个label
给它们添加一个左对齐的约束。勾选leading Edges,数值为0

然后给副标题label添加右边(尾部 trialing)约束和x方向约束即可。顺便把字体改小一点。
代码控制
我们先假设一个需要展示的数据类型
数据
新建一个SampleEntity.swift来代表数据
import Foundation

struct SampleEntity {
    var title: String
    var desc: String
    var isComplete: Bool = false
}

extension SampleEntity {
    static var testData = [
        SampleEntity(title: "iOS入门开发1", desc: "https://an.rustfisher.com"),
        SampleEntity(title: "iOS入门开发2", desc: "新手入门第2站"),
        SampleEntity(title: "iOS入门开发3", desc: "新手入门第3站"),
        SampleEntity(title: "iOS入门开发4", desc: "新手入门第4站"),
        SampleEntity(title: "Android", desc: "https://an.rustfisher.com"),
        SampleEntity(title: "Java", desc: "https://an.rustfisher.com")
    ]
}
子项Cell的控制
新建一个类继承UITableViewCell。新建swift文件SampleListCell.swift,里面定义一个类
子项中有一个按钮,给它准备一个点击事件
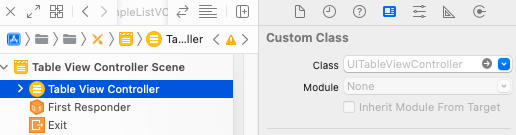
选择Tabel View Cell,选择它的类为我们创建的SampleListCell
选择了Custom类之后,接下来需要在storyboard上进行拖拽操作,把按钮和标题的label拖进来。
这里如果发现拖过去没有效果,可以重启一下Xcode。
先打开右侧一个新Editor,屏幕上同时显示代码和storyboard
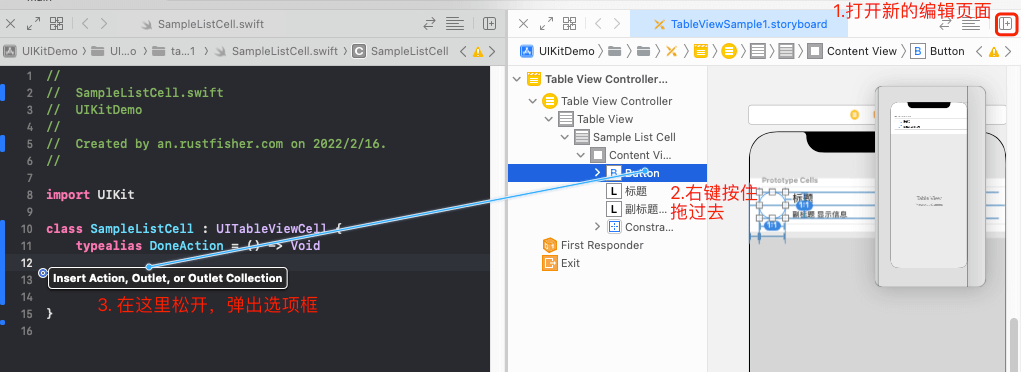
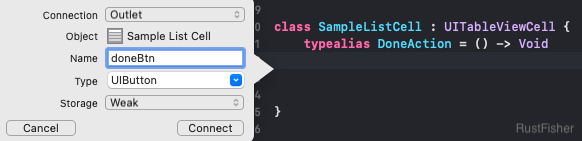
填入变量名,然后点击Connect按钮,得到变量
用同样的操作方法,把2个label拖过来
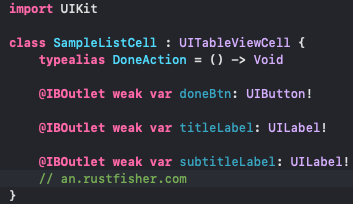
接下来添加一个按钮点击事件的方法。利用到前面设定好的DoneAction
// an.rustfisher.com
class SampleListCell : UITableViewCell {

    @IBOutlet weak var doneBtn: UIButton!

    @IBOutlet weak var titleLabel: UILabel!

    @IBOutlet weak var subtitleLabel: UILabel!

    typealias DoneAction = () -> Void
    var doneAction: DoneAction? // 新增变量

    @IBAction func onClickDoneBtn(_ sender: UIButton) {
        doneAction?() // 执行方法
    }
}
onClickDoneBtn前面会出现一个圈圈。鼠标左键按住然后拖动到Button上,即可建立连接。

上面是先写@IBAction代码,再拖到面板上。反过来操作也可以。
到此子项的控制已经准备好了。我们来看列表页。
列表页 UITableViewController
新建SampleListVC.swift文件。新建SampleListVC类继承UITableViewController
//
//  SampleListVC.swift
//  by RustFisher on 2022/2/16.
//

import UIKit

class SampleListVC: UITableViewController {

}
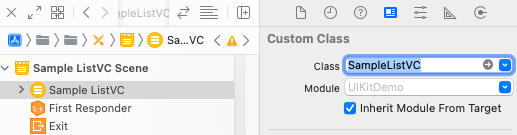
将这个controller类设置为Custom Class
Custom Class选择SampleListVC
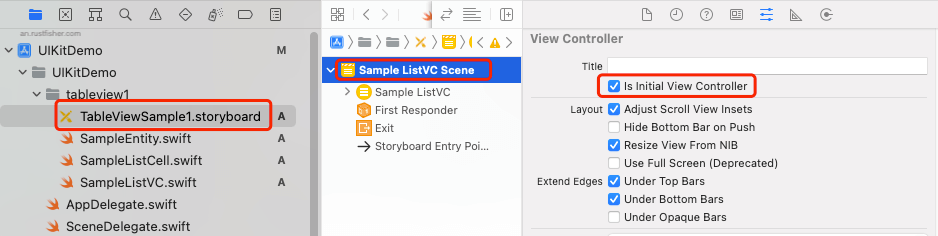
先更改app的默认storyboard。
项目里有多个storyboard,app入口是Main.storyboard,我们要把入口改为TableViewSample1.storyboard
在TableViewSample1.storyboard界面,勾选Is Initial View Controller
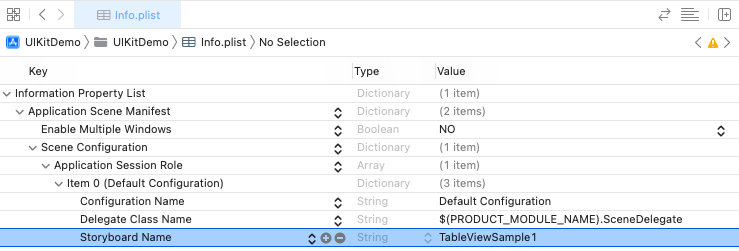
然后找到项目的Info.plist,修改配置Storyboard Name为TableViewSample1
运行app可以看到效果
运行效果图-空白列表
![]()
继续处理SampleListVC,让它显示我们的模拟数据
创建extension,定义一个字符串,复写方法tableView,确定数据数量
extension SampleListVC {
    static let sampleDataCellId = "sampleDataCell"

    override func tableView(_ tableView: UITableView, numberOfRowsInSection section: Int) -> Int {
        return SampleEntity.testData.count
    }
}
复写返回UITableViewCell的tableView方法。在里面控制子项ui,装载数据。
此时的SampleListVC代码如下
展示数据的SampleListVC
import UIKit

class SampleListVC: UITableViewController {

}

extension SampleListVC {
    static let sampleDataCellId = "SampleListCell"

    override func tableView(_ tableView: UITableView, numberOfRowsInSection section: Int) -> Int {
        return SampleEntity.testData.count
    }

    // 新增方法 处理Cell
    override func tableView(_ tableView: UITableView, cellForRowAt indexPath: IndexPath) -> UITableViewCell {
        guard let cell = tableView.dequeueReusableCell(withIdentifier: Self.sampleDataCellId, for: indexPath) as? SampleListCell else {
            fatalError("找不到SampleListCell")
        }
        let dataEntity = SampleEntity.testData[indexPath.row]
        let image = dataEntity.isComplete ?
            UIImage(systemName: "circle.fill"):UIImage(systemName: "circle")
        cell.doneBtn.setBackgroundImage(image, for: .normal)
        cell.titleLabel.text = dataEntity.title
        cell.subtitleLabel.text = dataEntity.desc
        // 准备处理点击事件
        return cell
    }
}
运行app
装载了数据的列表页

现在来增加点击事件。给Cell的doneAction赋予方法。
cell.doneAction = {
    SampleEntity.testData[indexPath.row].isComplete.toggle()
    tableView.reloadRows(at: [indexPath], with: .none)
}
isComplete取反,然后调用tableView.reloadRows刷新指定行。
增加点击事件的SampleListVC代码如下
import UIKit

class SampleListVC: UITableViewController {

}

extension SampleListVC {
    static let sampleDataCellId = "SampleListCell"

    override func tableView(_ tableView: UITableView, numberOfRowsInSection section: Int) -> Int {
        return SampleEntity.testData.count
    }

    override func tableView(_ tableView: UITableView, cellForRowAt indexPath: IndexPath) -> UITableViewCell {
        guard let cell = tableView.dequeueReusableCell(withIdentifier: Self.sampleDataCellId, for: indexPath) as? SampleListCell else {
            fatalError("找不到SampleListCell")
        }
        let dataEntity = SampleEntity.testData[indexPath.row]
        let image = dataEntity.isComplete ?
            UIImage(systemName: "circle.fill"):UIImage(systemName: "circle")
        cell.doneBtn.setBackgroundImage(image, for: .normal)
        cell.titleLabel.text = dataEntity.title
        cell.subtitleLabel.text = dataEntity.desc
        cell.doneAction = {
            SampleEntity.testData[indexPath.row].isComplete.toggle()
            tableView.reloadRows(at: [indexPath], with: .none)
        }
        return cell
    }
}
运行效果
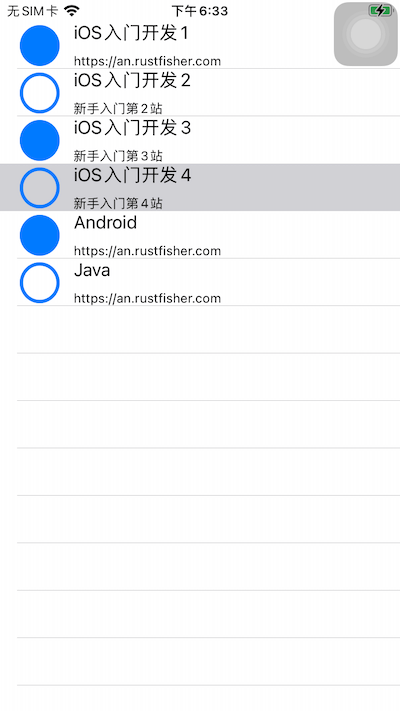
可以看到有个阴影。其实那个是高亮(highlight)。模拟器上无法响应点击。真机上可以。
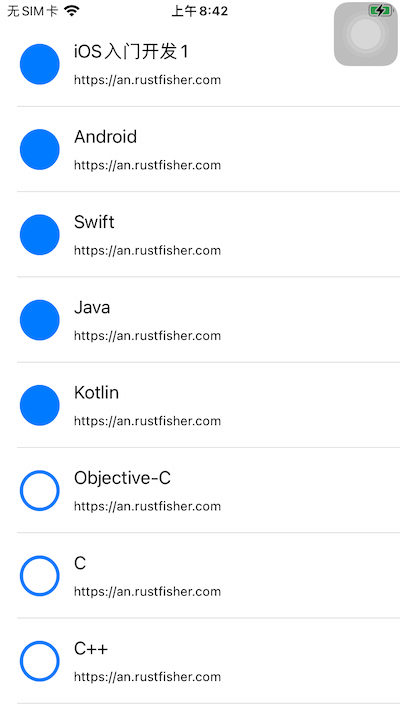
最后调整一下ui的尺寸,增加一些测试数据
运行效果
小结
本文介绍了在storyboard中使用TableView实现一个简单的列表。用图展示了一些操作。
反复练习基础性的东西,提高熟练度。以后就不会在简单问题上花费太多时间。
参考
使用storyboard与TableView的一个ToDo例子